I want to thank everyone who sent in emails or letters. They were much appreciated by those of us hoping to preserve the windows, and made an impact on the Commission. You made the difference.
Sunday, January 31, 2010
Kirkbride Update
On January 28th the Salem Historic Landmarks Commission voted to restore rather than replace three facades of windows. The facades face north, west and south and are the windows most visible to the public.
Tuesday, January 26, 2010
Save the Kirkbride Windows! Email Action and Hearing

Image courtesy of the Oregon State Library
The Oregon State Hospital was built in 1883 in Salem, Oregon. The plan for the structure was based upon the philosophy of Dr. Thomas Kirkbride. Here is a link to more information on other Kirkbride buildings around the country.
Last summer when I toured the rehabilitation of the facilities, the plan for the windows in the main older section was to have them restored and interior storms installed. Recently the group in charge of the restoration decided that the windows are not worth saving. They want to remove them and install new windows.
There comes a point when a person has seen enough destruction of irreplaceable building materials that something must be done.
I will be testifying on Thursday at the meeting of the Salem Historic Landmarks Commission to help try and save these beautiful windows.
Here are some detail photos of one of the sash.

Sash made from clear Western Red Cedar

Square-pegged rail and stile joints.

Really the only thing that needs work is new glazing putty.

Construction lines clearly evident.

Wedged muntin tenons.
Thanks for your help!
Friday, January 22, 2010
Diamond Details
Here are some more photos from the process of making the diamond sash.


I used a lot of small samples. I was able to check the mortises with the sample to make sure the angle was correct.

The muntin tenons are about 1/2" in length.

The muntin that intersects the corners does not have the full tenon on it. I didn't want to weaken the main mortise and tenon joint by cutting into it any more than I had to.


A picture looking down the line of mortises.

Fitting in the short muntins.

Everything fitted and sash is ready for the finishing touches.
Thursday, December 10, 2009
Preservation Field School 2009
I have a couple of projects from the summer that I wanted to post about.


After the fixed sash was removed the puzzle began. Lots and lots of coping had to be done. Most of the Union Jack design ended up having to be rebuilt. I only had a week with these students and they had varying degrees of experience so most of the time we were trying to get a handle on the Union Jack area. By the end of the week most of the fixed sash had been repaired but that left the main frame and the transom to be fixed by me once the fair was over.


The first one being the Preservation Field School workshop at the State Fair. I was invited to be an instructor for this week long event which was held during the Oregon State Fair. Holding the event during fair time made for an interesting format. Thank goodness that the State Historic Preservation Officers were on hand to field questions from the general public.

Window before restoration (2007).

Extensive rot in the sill (2007).

Window after restoration(2007).
The workshop was held at the Poultry Barn. This barn was built in 1921 out of hollow clay tiles covered in stucco. Each of the windows is comprised of an 8' tall fixed sash with a 4' tall arched transom that operates in the hopper style, interior swing. The bottom row of the fixed sash has a Union Jack design incorporating amber glazing. The amber glazing is original to the building and is not manufactured any more. It is thought that the amber shaded the poultry from the sun.

The students practicing their hand sawing skills.

And more practicing.
I had six students which was about the right size for the space that we had. All windows on the West elevation have been restored so for the workshop we chose one of the worst windows on the South side of the building. This window has had extensive repair work done in the past. Due to insufficient funding and/or knowledge the repairs were not the best, it appeared that they used whatever materials they had around the shop.


There was significant failure in the sill and bottom rail which resulted in the fixed sash dropping about 1 1/2".

After removal of the plywood the extent of damage to the Union Jack design became clear.


The window finally was completed at the end of October.

The stucco chicken heads go all the way around the building. They are one of the unique features of this building. Another feature is the missing fountain that operated in the center of the building. Unfortunately the fountain was removed and it has disappeared. We have not been able to find any photos of this feature. If anyone out there has any information about this fountain or other fountains in poultry barns please feel free to contact me.

Lots of work yet to be done.
I want to thank Oregon SHPO and the Pacific Northwest Field School for inviting me to teach at this field school. I attended this school many years ago and it was nice to come full circle and teach the next generation of craftspeople.
Monday, December 7, 2009
Diamonds Are A Girl's Best Friend

Here is the assembled sash. All the measurements worked out as I had drawn them. I was really surprised at how much diagonal pressure there was as I put it together.
Onto the next one. I will post more detail photos soon.
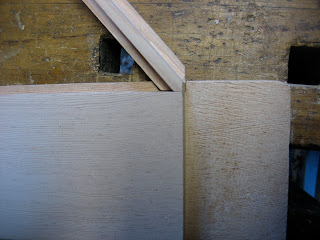
Sunday, November 15, 2009
"Waxahatchie", part 2

Also, you should know that the interior is stain-grade so I had to take a lot of time making sure the coping on the interior side looks extra good.


Finished muntin, interior
The next step will be to fit the smaller muntins.
Thursday, November 12, 2009
What's All This
 Earlier this year I was asked to participate in a film about Historic Preservation and sustainability. The film's website has just gone up with the film's trailer and some clips from the interviews they did. Click here to see the clip. The film is expected to come out in the spring of 2010.
Subscribe to:
Posts (Atom)